How to configure development server certificates for iOS 13 and Mac clients
February 29, 2020
I recently hit some bumps on the road when trying to set up a development API server for iOS 13 clients. I kept hitting TLS errors and API calls wouldn’t go through, even though I thought I had done everything correctly.
It turns out Apple has hardened the security requirements for server certificates in iOS 13, and you must correctly set up development certificates to match the new requirements. There isn’t very clear info available about what you must do to set your server and certificates up the right way. There are a number of writeups available (linked at the end of this post), but I didn’t find one good resource with fully working instructions.
So, here are the instructions mostly for my own future self, but why not anybody else too who might benefit from this.
Background
The Internet is a hostile, insecure place. Securing communication channels with TLS and certificates is a good protection against lots of the hostility. I’m going to assume that you know in broad terms that we commonly use client-server systems, with mobile devices being the clients, and the servers serving some kind of API for the clients. API-s are typically served over HTTPS, secured with TLS and public key cryptography with keys and certificates.
Apple has aggressively been steering towards using TLS and HTTPS in all communications, and by default rejects non-TLS connections. For publicly reachable servers, Let’s Encrypt is a great free solution, but it doesn’t help with development systems when you just want to hack something together quickly.
There are some loopholes/emergency hatches left in the system and you can enable non-secure communications bypassing the TLS/certificate requirements, like NSAllowsArbitraryLoads and such. I think I’m doing myself a favor by not using any of those. It’s better to cultivate a security mindset with all the channels secured at all times, even during development.
Apple continued in this direction by publishing requirements for trusted certificates in iOS 13 and macOS 10.15, and enforcing these requirements in the system. I think it used to be possible to have a standalone self-signed web server certificate that worked with iOS, but this appears to no longer be the case. If I understand things correctly, having “ExtendedKeyUsage (EKU) extension containing the id-kp-serverAuth OID” in the server certificate means that it cannot be simultaneously used as a CA certificate for itself, and there is no way to mark this certificate as trusted in iOS. So, we must now always have at least two certificates: the Certificate Authority (CA) who is the issuer, and then the actual TLS (web) server certificate. You can install the CA cert as a trusted root in iOS and macOS development clients, and the individual server certificates issued by this CA are then trusted as well.
Step by step
Let’s go ahead and assume I have nothing set up yet: no CA, no server certificates. I am starting a new project from scratch, and want to have a development server running, and my iOS and macOS clients can connect to it for development purposes. Here are the exact steps to create the right certificates that worked for me as of February 2020.
I ran all these commands on the macOS Terminal command line. It’s mostly adapted from this gist.
1. Generate CA key
openssl genrsa -out development-ca.key 4096
2. Generate CA certificate
openssl req -x509 -new -nodes -key development-ca.key -sha256 -days 365 -out development-ca.crt
When you run this on the command line, OpenSSL prompts you for a bunch of values to include in the certificate. It is crucial that you specify a good human-readable Common Name, because that’s what iOS uses for display purposes. If you don’t specify CN at all, the certificate doesn’t show up in the Certificate Trust Settings list at all, and you can’t enable full trust for it. I don’t think any of the other fields matter much, but do specify a CN. (And obviously, I found this out the hard way, by leaving out the CN at first, and then wondering why the certificate didn’t show up.)
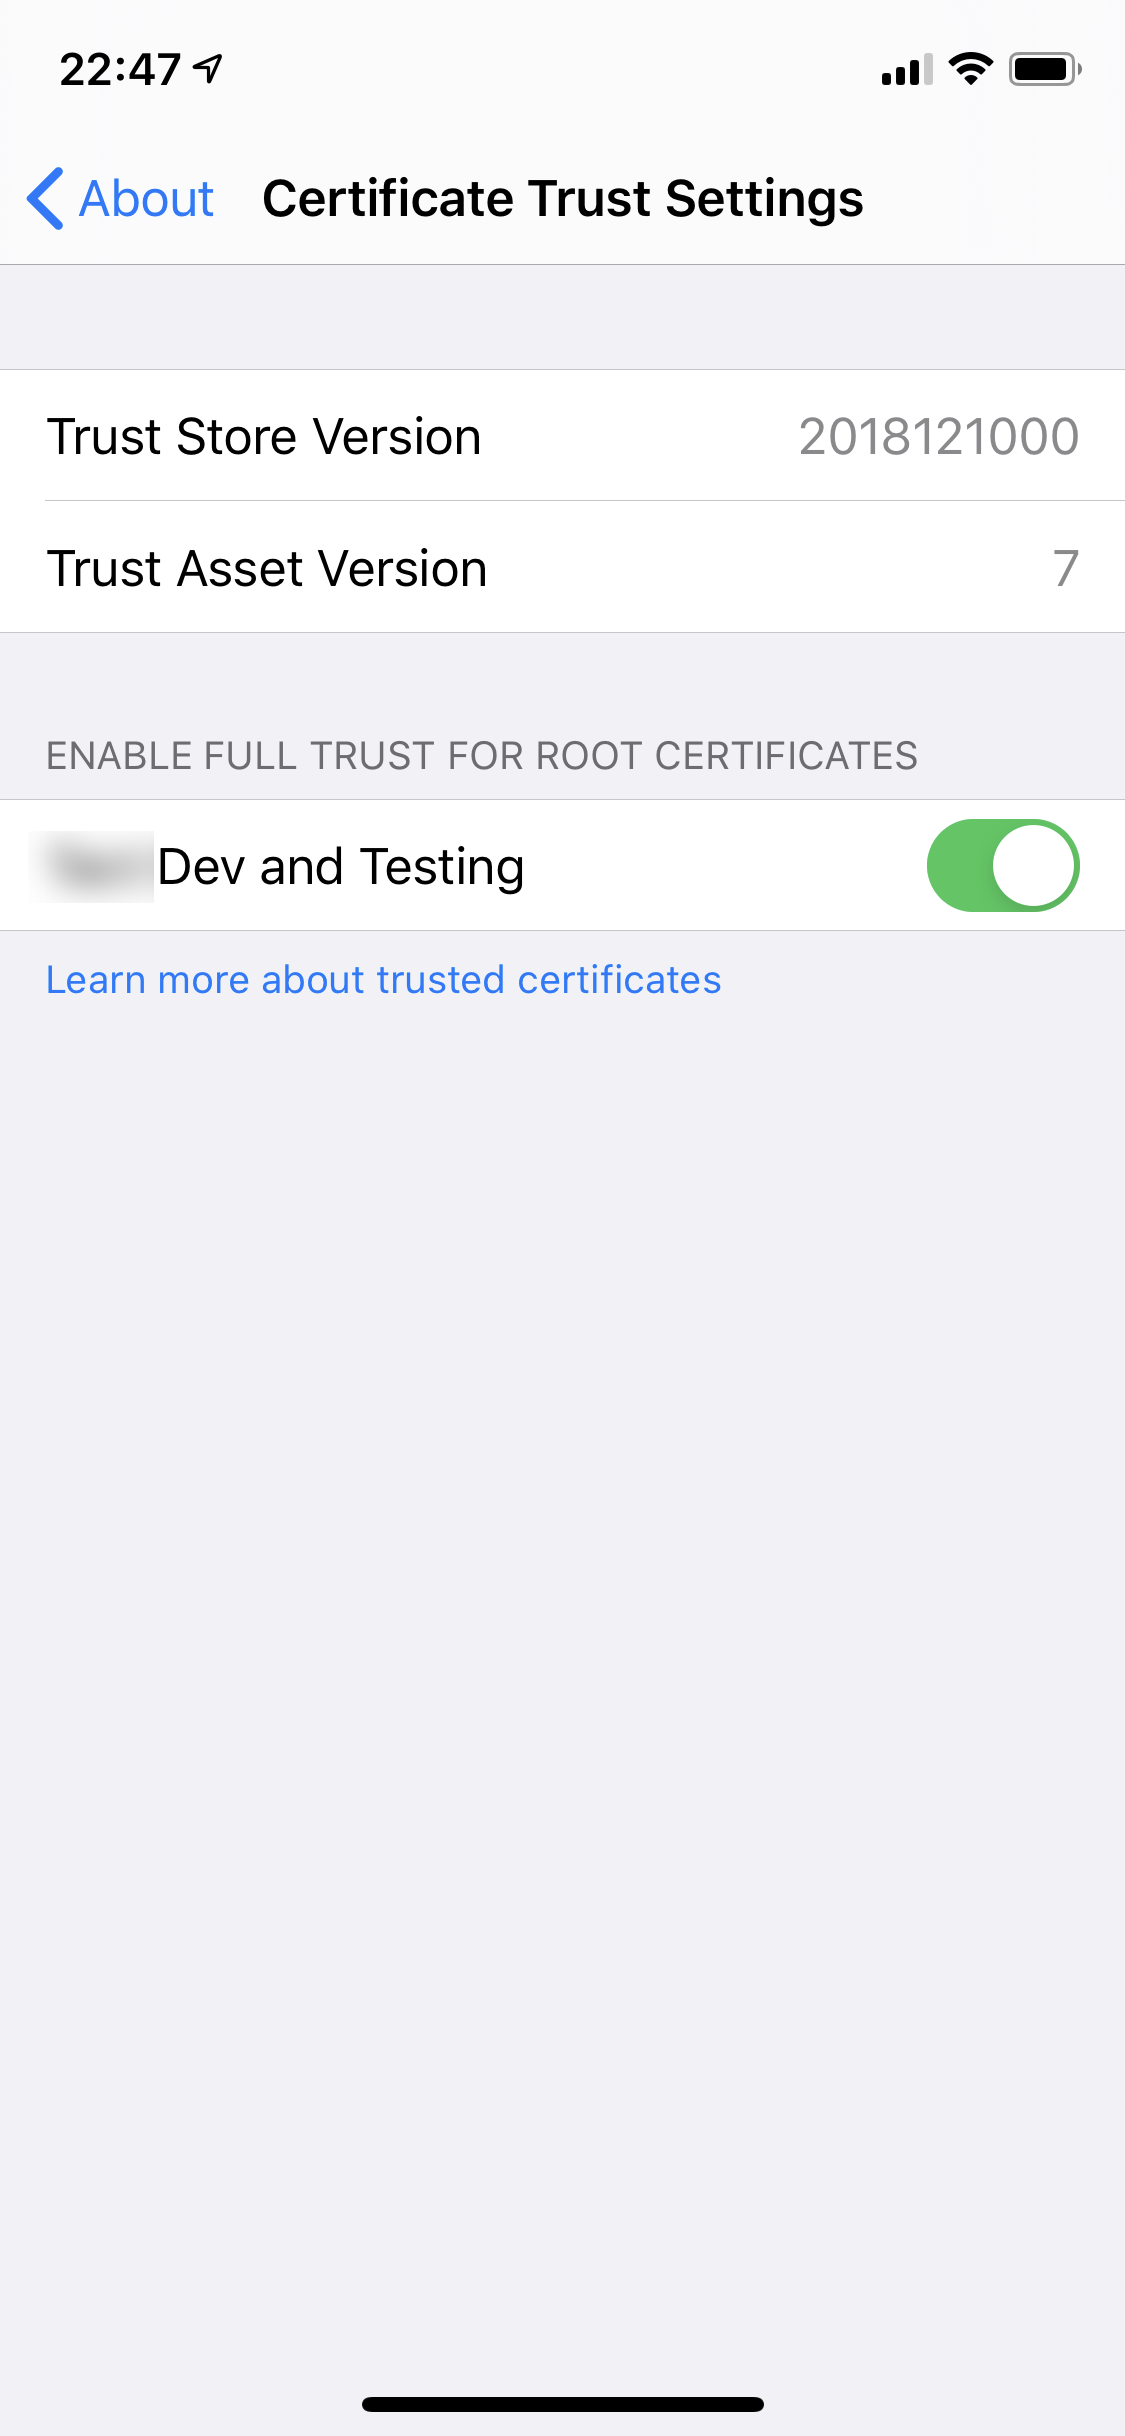
3. Install the CA certificate on iOS
Go ahead and email the development-ca.crt file to yourself, and open it in iOS Mail. (Or use any other file transport method, like save it in iCloud Drive and open it from there.) Follow the prompts to install the profile (which is automatically generated based on the certificate), and then go to General, About, Certificate Trust Settings to enable the trust.
Do take a deep breath at this point and consider the security implications of this action. You are trusting all certificates issued by this CA for connections. It’s probably all fine if you are in full control of all the system pieces, but do understand that what you are doing is about policy/security of whoever’s device you are doing this on, not just technology.
If you have done everything correctly, this is what it should look like.
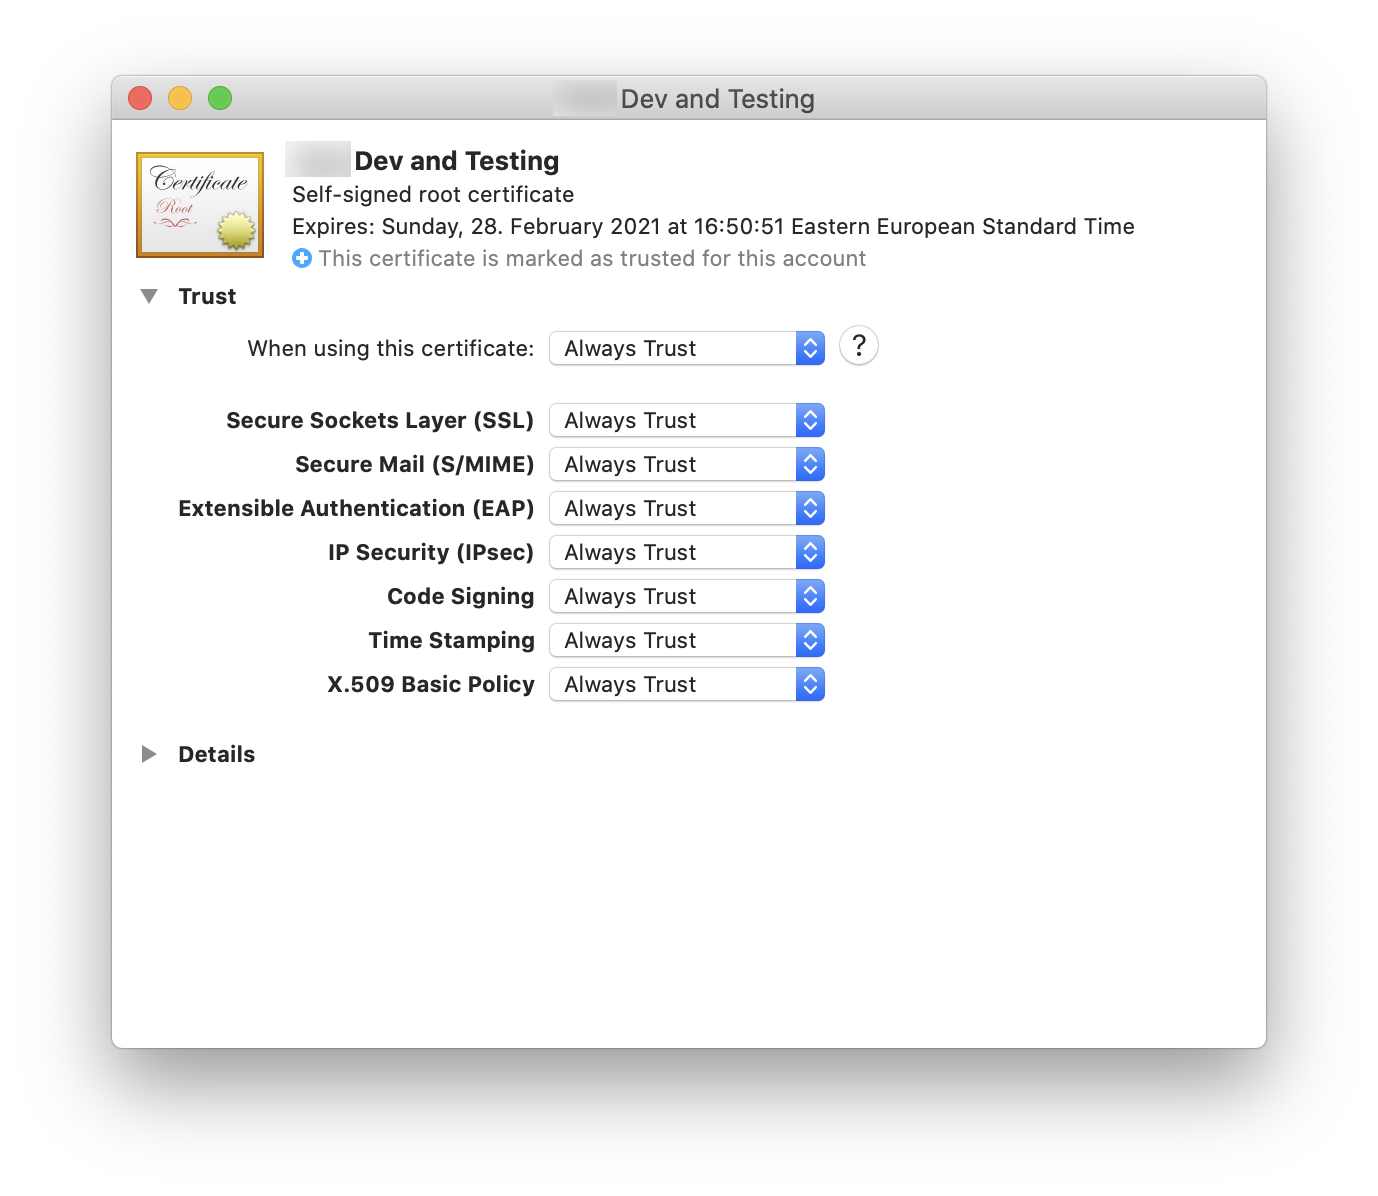
4. Install the CA certificate on macOS
Double-click on the development-ca.crt file on macOS to open it. Install it in your login keychain. Then, open it and specify “Always Trust” for it. See the above note about security and policy implication of this.
You are now done with the root certificate part. Now let’s move on to the server certificate.
5. Generate server key
openssl genrsa -out development.key 4096
6. Generate server certificate request
openssl req -new -key development.key -config config.cnf -out development.csr
Oh, a new file enters the picture, “config.cnf”. Before actually running this step, create this file with the following contents (modified to your own circumstances, of course):
[ req ]
prompt             = no
default_bits       = 4096
distinguished_name = req_distinguished_name
req_extensions     = req_ext
[ req_distinguished_name ]
countryName                = EE
localityName               = Tallinn
organizationName           = MyProject
commonName                 = 192.168.0.10
[ req_ext ]
extendedKeyUsage = serverAuth
subjectAltName = @alt_names
[alt_names]
DNS.1 = localhost
IP.1 = 192.168.0.10
IP.2 = 127.0.0.1
Update, July 2020: I have changed the alt_names part above. iOS 13 allowed both DNS names and IP addresses to be tagged with DNS entries. It appears that iOS 14 has hardened this verification, and you must really specify DNS names with DNS entries, and IP addresses with IP entries.
I am not sure if commonName does anything, but I specify the server name there.
In alt_names, specify all the hostnames and IP addresses where a server with this certificate might be running. iOS actively validates this info and will reject the connection if the certificate does not contain a name matching the actual server hostname/IP.
7. Verify the CSR
openssl req -in development.csr -noout -text
This is just a cosmetic step to make sure you are on the right track. It shows you the contents of the Certificate Signing Request that you just created. Do look for these lines to be present in the output:
Attributes:
    Requested Extensions:
        X509v3 Extended Key Usage:
            TLS Web Server Authentication
        X509v3 Subject Alternative Name:
            DNS:localhost, IP Address:192.168.0.10, IP Address:127.0.0.1
8. Issue the certificate
The grand finale. The CA that we previously created, will now issue the server certificate.
openssl x509 -req -in development.csr -CA development-ca.crt -CAkey development-ca.key -CAcreateserial -out development.crt -days 365 -sha256 -extfile config.cnf -extensions req_ext
One thing worth calling out is the validity duration of the certificate. According to Apple docs: TLS server certificates must have a validity period of 825 days or fewer. I’m not sure if this is enforced for both the CA and server certificates, or only the server. In any case, I’m using 365 days as the certificate duration in all of the above snippets. If you set it for too long, it will fail, like a reader found out and helpfully informed me, so I added this clarification.
9. Verify the certificate
openssl x509 -in development.crt -text -noout
Again, just for visual verification. Make sure that you still see the extended key usage stuff in the output.
10. Configure your web/API server
This is server-specific. You need to tell your server to serve HTTPS with these certificates. Sometimes you need to merge the CA and server certificates into some kind of bundle. I happened to be using Node.js, where the setup is straightforward with these certificates:
import https from "https";

// start the Express server
https.createServer({
    key: fs.readFileSync("certs/development.key"),
    cert: fs.readFileSync("certs/development.crt"),
    ca: fs.readFileSync("certs/development-ca.crt")
}, app).listen(port, host, () => {});
Connecting from the client
Phew. Many steps, but that should be it. After doing this, you should attempt a HTTPS connection from your iOS 13 or macOS client app to your development server, and it should Just Work.
If it doesn’t, look for errors in your console/log. You may see things like…
2020-02-29 23:19:12.601796+0200 MyApp[830:144703] Connection 1: default TLS Trust evaluation failed(-9843)
The error codes are available at the end of this Apple Technical Note.
Resources
I compiled this writeup based on many other resources I found. Thank you to all the writers and contributors of these.
Basic idea of how to use HTTPS with Node.js and Express
A helpful gist that contains (almost) the exact right instructions for the above
How to verify the right server certificate fields on macOS
Why does iOS 13 not trust my own Root CA?
Apple Technical Note: HTTPS Server Trust Evaluation. Lengthy and heavy and largely too low-level, but contains most of what you might want to know on the topic. Towards the end, has a handy list of common TLS error codes that you may encounter.
Apple Technical Q&A QA1948: HTTPS and Test Servers. Handy instructions on how to easily get the root certificate installed into simulator and various platforms.
Apple Technical Note: Creating Certificates for TLS Testing. Describes how to use Keychain Access to do the same steps that I have with OpenSSL above. I much prefer the command line, the Apple process is more opaque, but good to know for completeness.
Requirements for trusted certificates in iOS 13 and macOS 10.15
Trust manually installed certificate profiles in iOS and iPadOS