Using Hone to play with advanced Apple typography
November 11, 2015
Hone continues to be a pet project for myself, Sergio and Priidu. There hasn’t been much public fuss around it lately, but we’ll continue to operate it as a side project/technology demo. From time to time, we’ll use it as a vehicle to explore interesting concepts around designer-developer collaboration and UI technology on various platforms.
One of the concepts I always wanted to expand in Hone was typography. Beautiful type is a crucial part of both analog and digital experiences. I got the extra push to move forward with this when Apple announced their custom-designed San Francisco font for all platforms (OS X, iOS, Watch and TV). San Francisco has beautiful advanced typographic features, but not too many tools for designers to directly play around with those features in the context of a live application. Well, this is exactly the kind of stuff that we designed Hone for.
Short summary and demo
If you don’t care to read for much longer, here’s what you can do: go to hone.tools and download the latest version of Hone for Mac. Also, get Alarm from App Store for your iOS device. We’ve updated Alarm to use the system font (San Francisco), and also updated the tool such that it can control this font’s advanced typographic features. So, poke around in the tool and find any font entries, modify them, and see the changes applied on Alarm on your device.
The rest of this post is about how exactly this works internally in the Hone world, and how you can use the typography control in your own iOS projects.
The Hone type system
A central piece of any system that manages any kind of data is its type system. What kind of data can it manage, and how can you compose these pieces?
In the initial version of Hone, I had four primitive types: integer, floating point number, boolean, and string. I also had two composed types: “color”, consisting of RGBA components in the form of four floats, and “font”. Font consisted of an explicit typeface name, its size, and two advanced typographic properties that I arbitrarily chose: switching between oldstyle and regular numbers, and switching between proportional and monospaced numbers. Well, these choices weren’t entirely arbitrary: I just happened to work on Wire at that time, and we were working on typography and wanted to experiment with number styles. So, the feature was born and locked in that you can control these exact properties of the font, but nothing else.
Regarding fonts, there’s a bit of a problem by requiring you to input an explicit font name: Apple doesn’t want you do do that. Apple encourages developers to think in terms of a “system font”, which may change from time to time. It makes sense: the system font on Mac has evolved from Lucida Grande to HelveticaNeue to now San Francisco. If you were using the correct “system font” API-s, your code remained working throughout all these changes without having to do anything. With explicit font names, you don’t get the benefit of all the optimizations that Apple has done to its UI fonts, you may get fonts that are more optimized to use cases other than the UI etc. So, pretty soon, it became clear that this choice of always requiring a font name was limiting, and I need a better approach.
However, advances to Hone’s type system were also motivated by an entirely different actor: Android.
Android, custom types in Hone, and document format v2
What? Isn’t this supposed to be a post about iOS? Yes, we’ll get back to that, but bear with me, the Android part is interesting.
This summer, we built Hone library for Android. Pretty early into the project, we saw that the Hone type system was somewhat limiting regarding the kind of stuff you need to do to actually manage real Android layouts. Yes, you can specify the margins with numbers, but it’s equally important to specify higher-order properties: should the layout gravity (alignment) be left, center or right? Should images be cropped in smaller containers to maintain original size, or should they be scaled down? If we specify a number in units, what kind of unit is it? Android mostly uses dp (device-independent pixels), but for type, it’s common to use sp (scaled pixels) that scale up or down according to user’s preferences, kind of like Dynamic Type in iOS.
There was no meaningful and usable way to use the current Hone library and document format to specify any of these relations and semantics. You could build all the semantics into the library and maybe base it on something like “if the name of a value has some special prefix/suffix, treat it as some kind of specific value.” (The Android library actually does some of this too.) But I wanted these semantics to be more clearly reflected in the document format and type system itself.
What I didn’t want to do, is to globally and centrally manage the Hone type system, maybe by building a bunch of advanced types into the Hone tool and all platform libraries. This would have been very difficult to update. I also did not want to make the tool to be too platform-aware: it should work all the same, regardless of whether you are editing an iOS, Android, or any other platform project.
So, what we ended up with for Android, which seems to be working quite well, is Hone document format version 2, which contains the concept of custom types. The two most important types are the enum type that specifies a set of mutually exclusive options for the user to pick from, and compound type that lets you compose other types into more richer units. For a full spec, see Hone document format v2, and Android library custom types.
The nice thing about custom types is that the tool can autogenerate the correct and pretty nice UI for editing, while not having to deal with the actual semantics of custom types. Also, the whole system is easily extensible: if you find that you need a new custom type in your project, just add it to types.yaml of your project, and use the Hone library callbacks to specify a handler for that type.
The iOS type for custom typography
The work we did in the Android project provided a solid foundation for implementing the custom font data type in the Hone iOS library, which I have called AATFont, per “Apple Advanced Typography”. In v1, the various attributes of the font were baked in to the core of the project and tool, making it impossible to extend, and so it sits there as an obsolete legacy piece. AATFont is implemented as a custom compound type using the above-described type system. All I did was took interesting attributes from Apple’s font feature registry and encoded them into the Hone AATFont type. When you play with Alarm, you’ll see this in action.
How to make your own iOS project with advanced custom type
If you want to experiment with this, here’s a rough guide. This is not a complete tutorial: I’m skipping over some pieces and assuming that you have the knowledge and experience to complete the missing parts on your own. (But do ping me if you have specific problems or questions, and I’ll add to this.)
First, make a new blank iOS project. Xcode’s “Single view project” template is the easiest starting point. Use Swift. Add a single label to your storyboard, and add an outlet for it in your view controller.
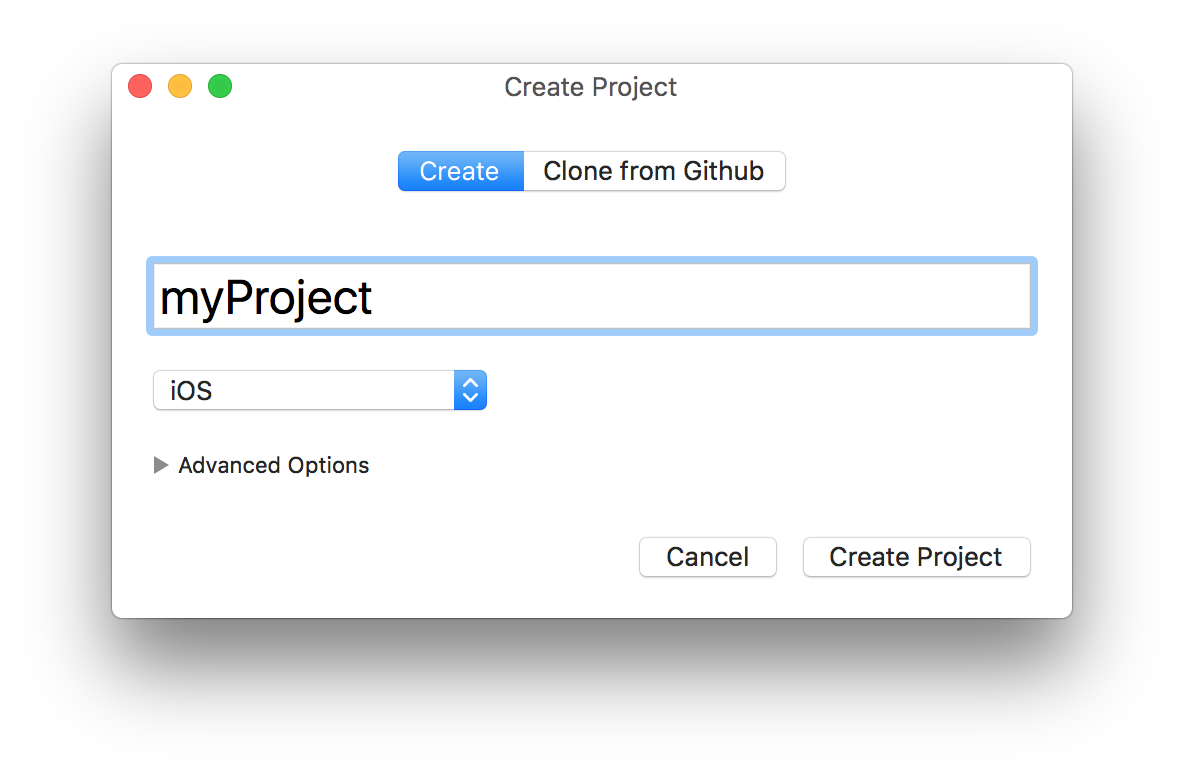
Now, start the Hone tool. Create a new project (you’re asked to sign in/register for Hone during this process). Make sure you select “iOS” as the platform.
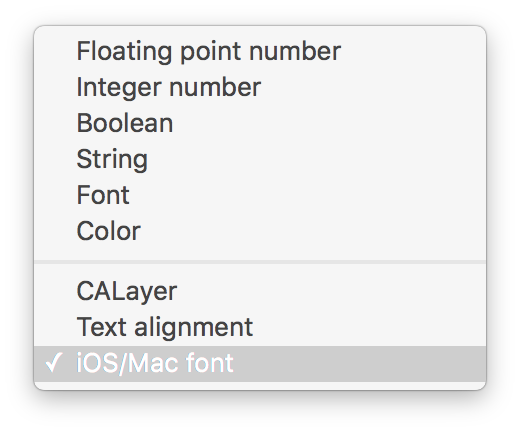
You’ll see a blank project window. In bottom left, click plus and “Add Object”. Name it myObject. Make sure the object is selected, click plus again, and add a value to myObject. You’ll get a type picker. Make sure “iOS/Mac font” is selected.
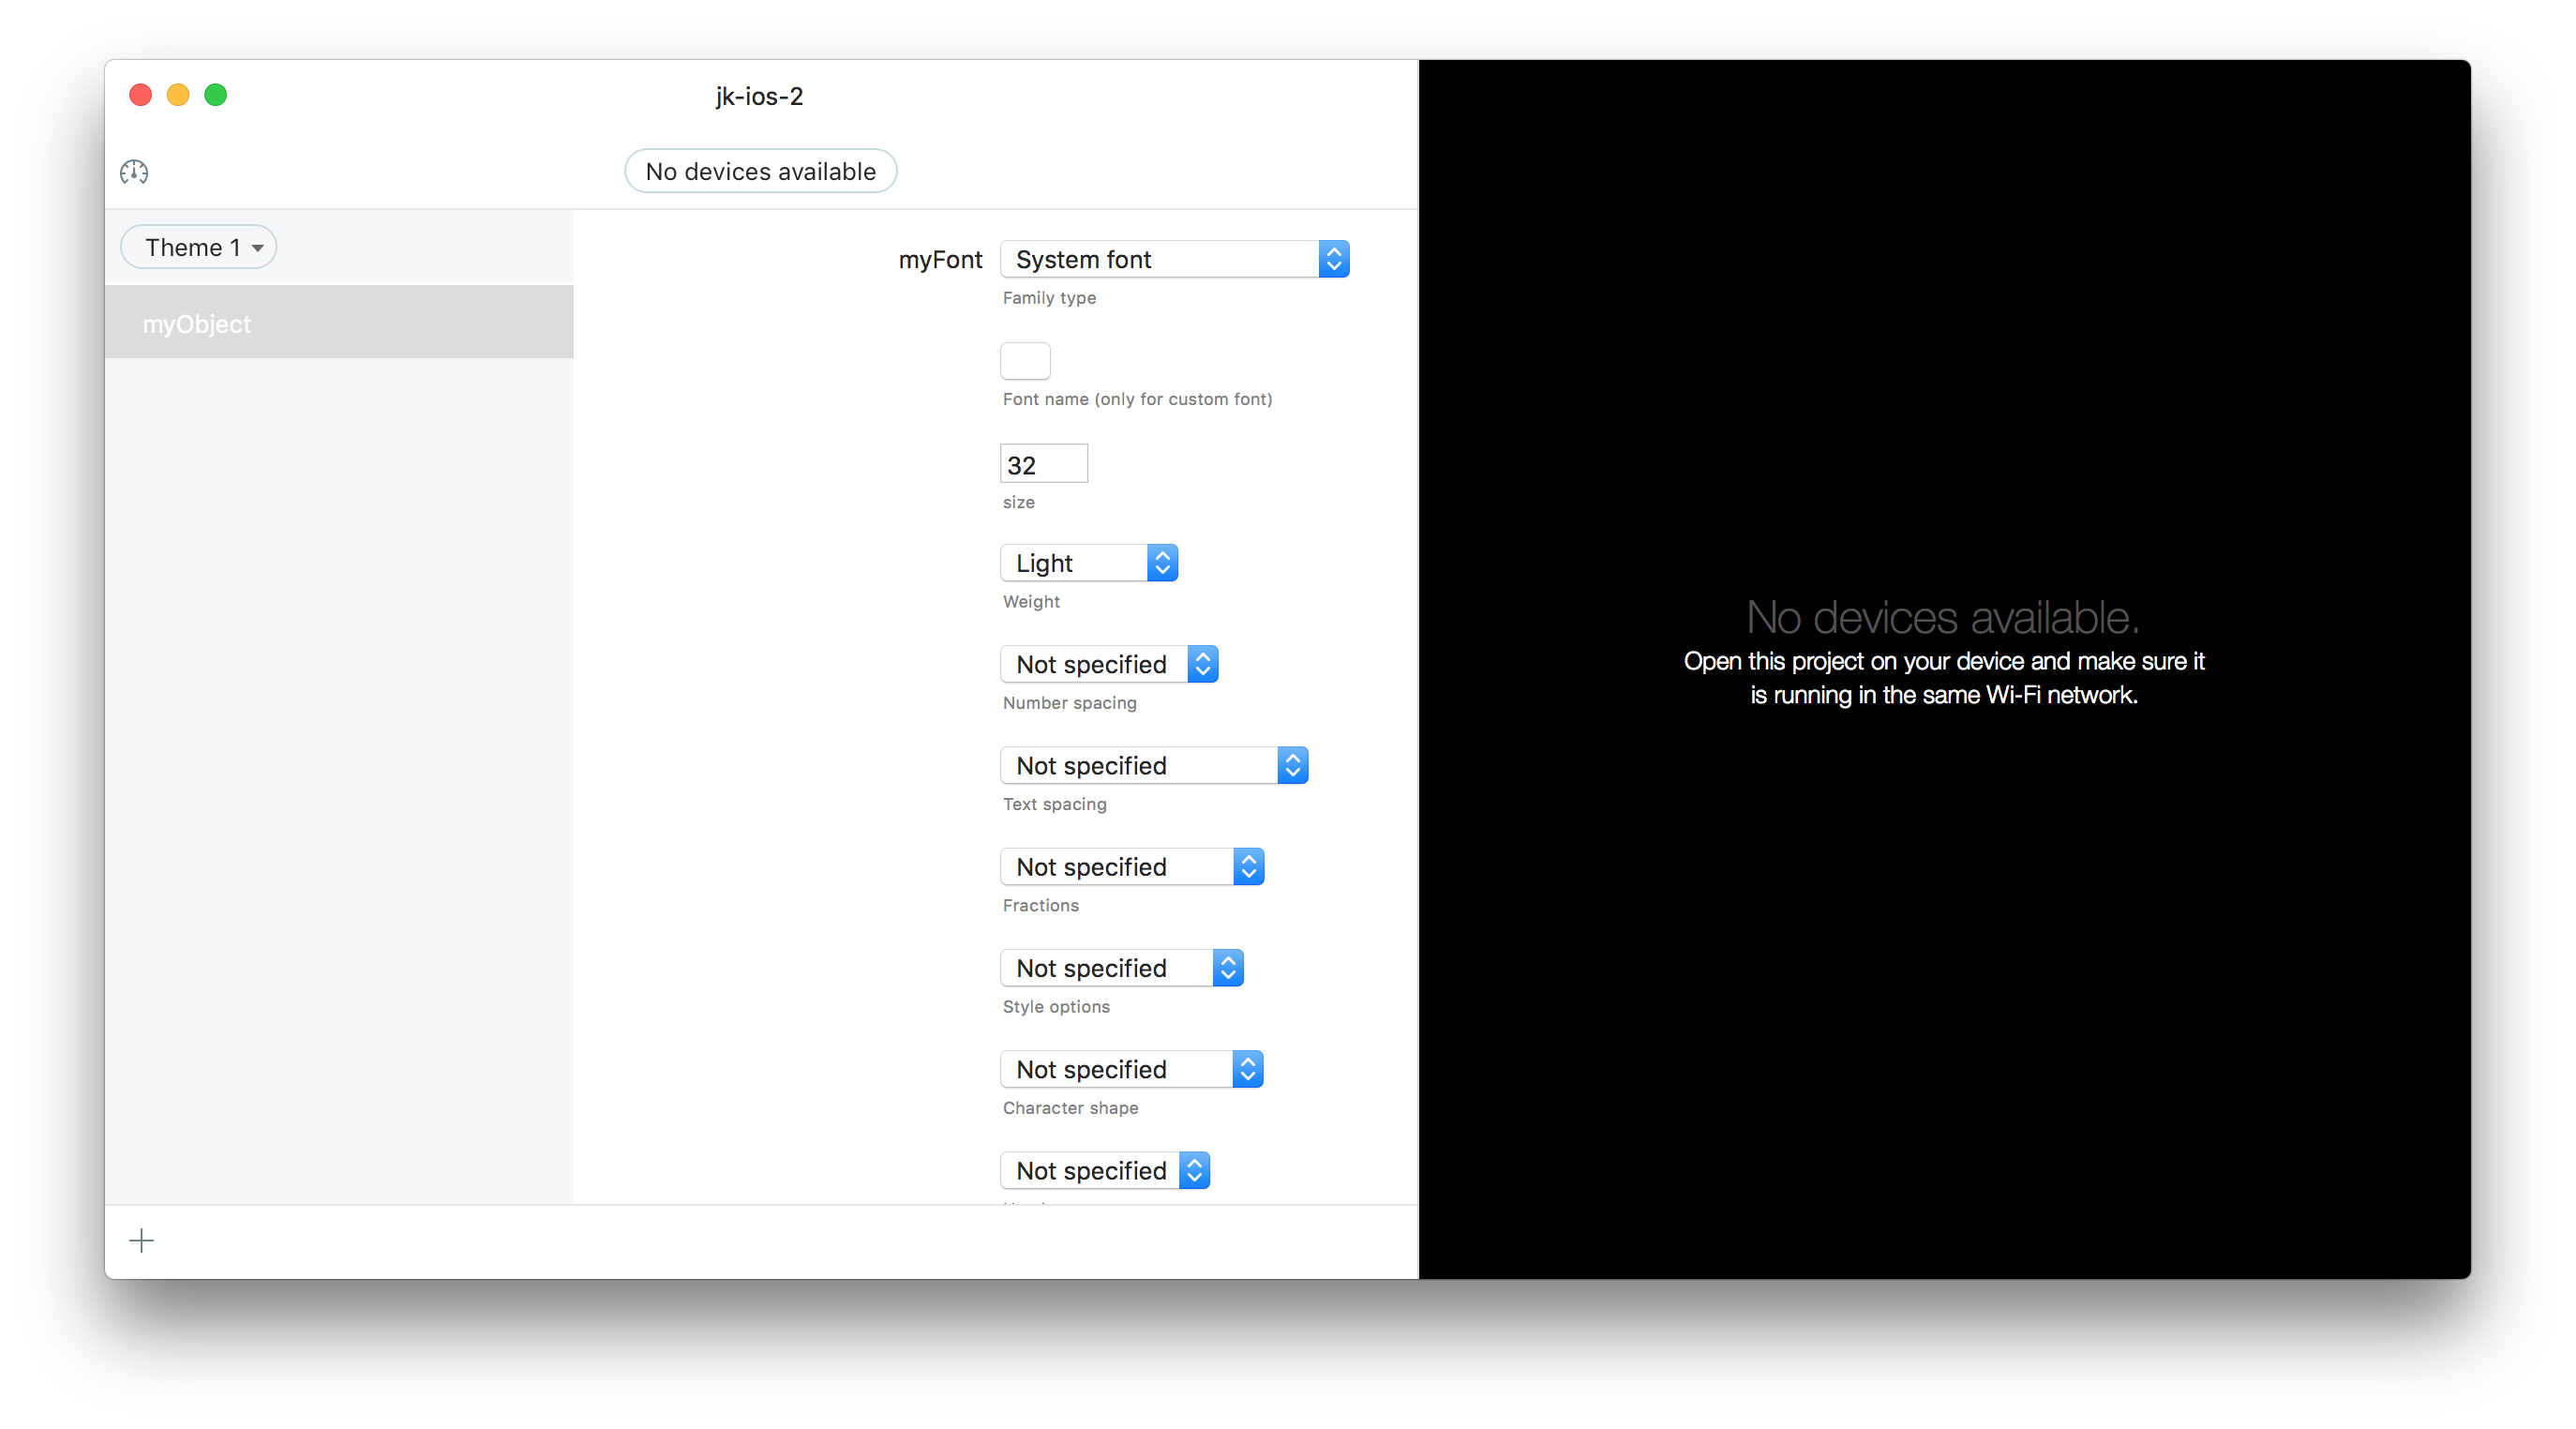
You’ll end up with a document like this. All good. Save it.
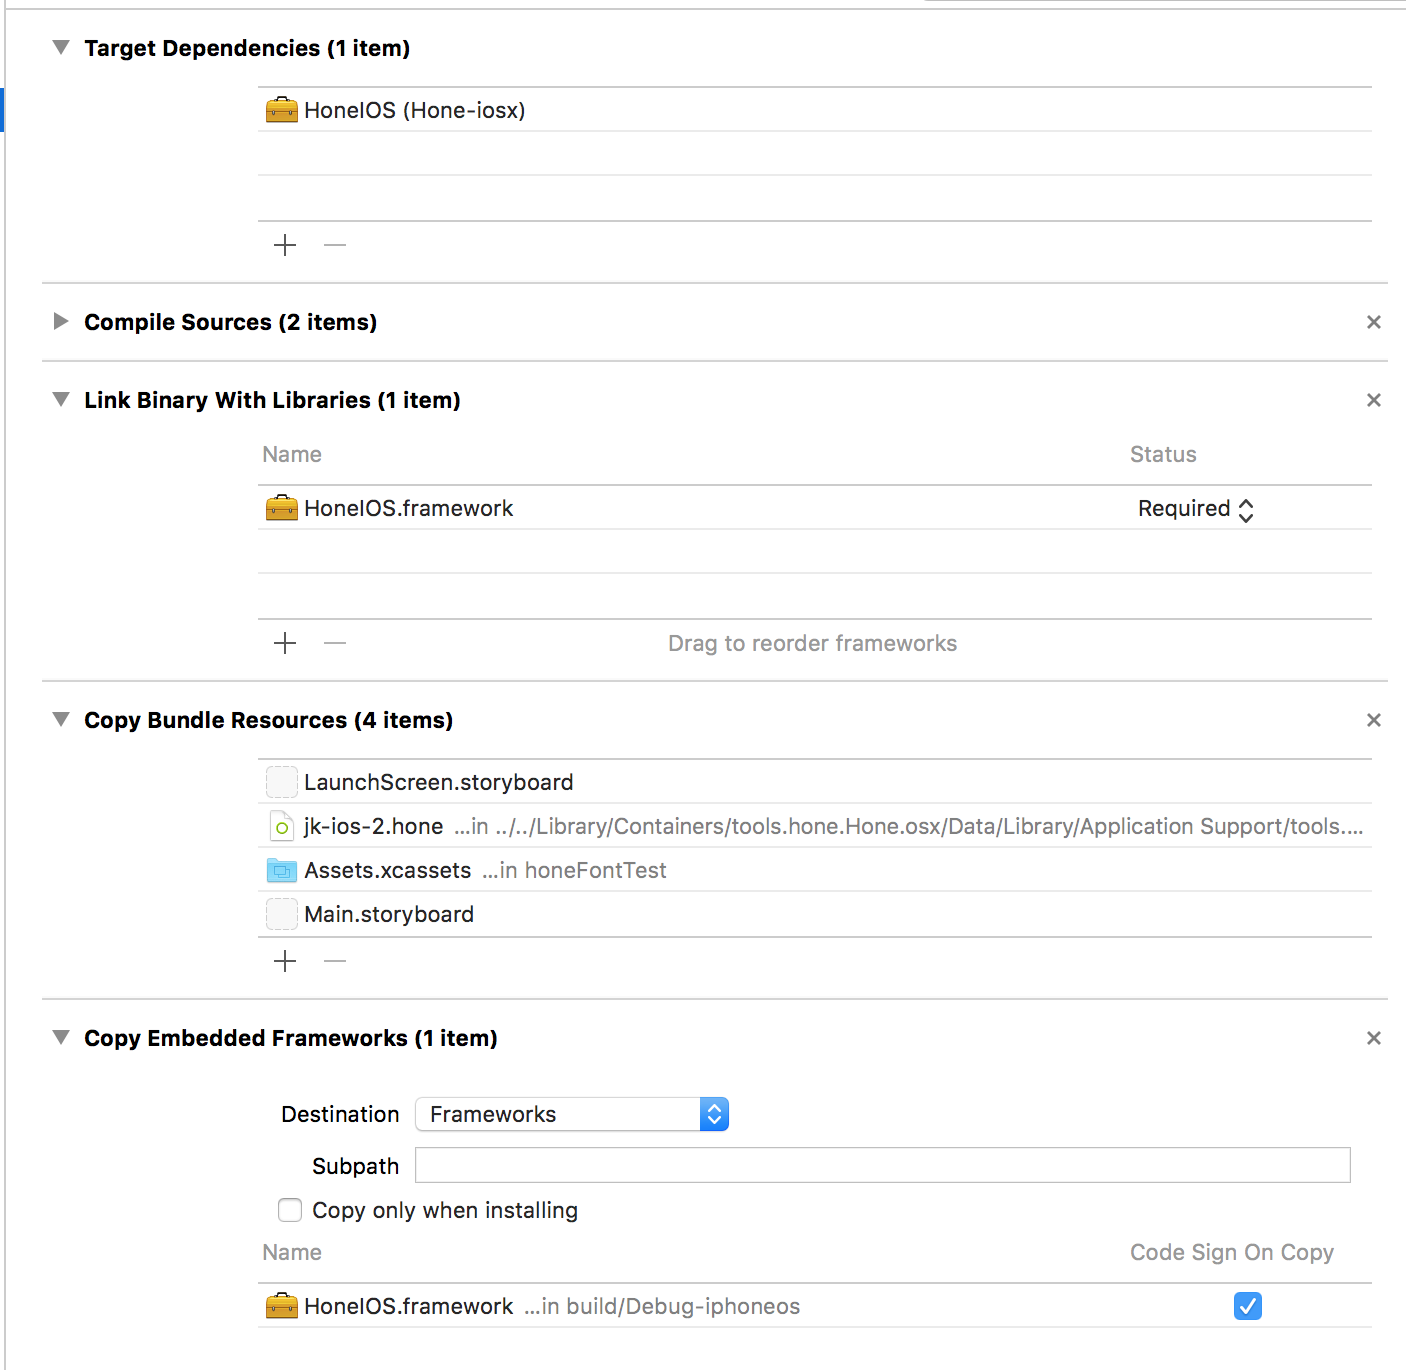
Go back to your Xcode project. Clone hone-iosx and add it as a subproject to your own project. Add HoneIOS as a dependency, linked project, and embed the framework into your app. Also, add the Hone document to your project as a resource. Your Xcode project build phases should look like this by this point.
Now, let’s code. Add this into your applicationDidFinishLaunching app delegate function. Of course, replace the credentials with your own. Add import HoneIOS at the top so it can find the module.
let honeDocumentURL = NSBundle.mainBundle().URLForResource("your-document-name", withExtension: "hone")
do {
    try HNE.startWithAppIdentifier("your-identifier", appSecret: "your-secret", documentURL: honeDocumentURL, developmentMode: true)
} catch {
    print("error starting Hone: \(error)")
}
Add the value binding to your view controller. Here’s what the whole view controller should look like.
import UIKit

class ViewController: UIViewController {

    @IBOutlet weak var label: UILabel!

    override func viewDidLoad() {
        super.viewDidLoad()
        // Do any additional setup after loading the view, typically from a nib.

        label.bindKeypath("font", toHoneValue: "myObject.myFont")

    }
}
You’ll see that there’s just one line to do the advanced typographic binding. Now, if you run the tool and the app in the same network, you can connect from the tool to the app and start playing around with the font.
There’s a picker in the tool for font type, where you can choose between “system font” and “custom font”. The custom font picker is the button below this field, which contains all fonts that are known to the device to which you are currently connected. This contains all fonts provided by the device’s platform, as well as any custom fonts that you’ve registered in your own code.

Not all fonts implement all advanced features: for example, some fonts have small caps and oldstyle numbers, some don’t. You can either look at your font docs, or just play around with Hone. For all the features, “Not specified” means to just use the default behavior of the font for that feature.