How to add a custom separator supplementary view to UICollectionView
April 12, 2014
I ran into something recently that I thought might be interesting to post, since I did not see a similar example online: adding custom supplementary views to UICollectionView.
I needed to add a separator in a particular spot between the items within one section. Now, you might do this with collection view sections instead of a custom supplementary separator view. But suppose that you don’t want to re-partition your data into sections, and are just getting a flat array from upstream, and just want to work with that one.
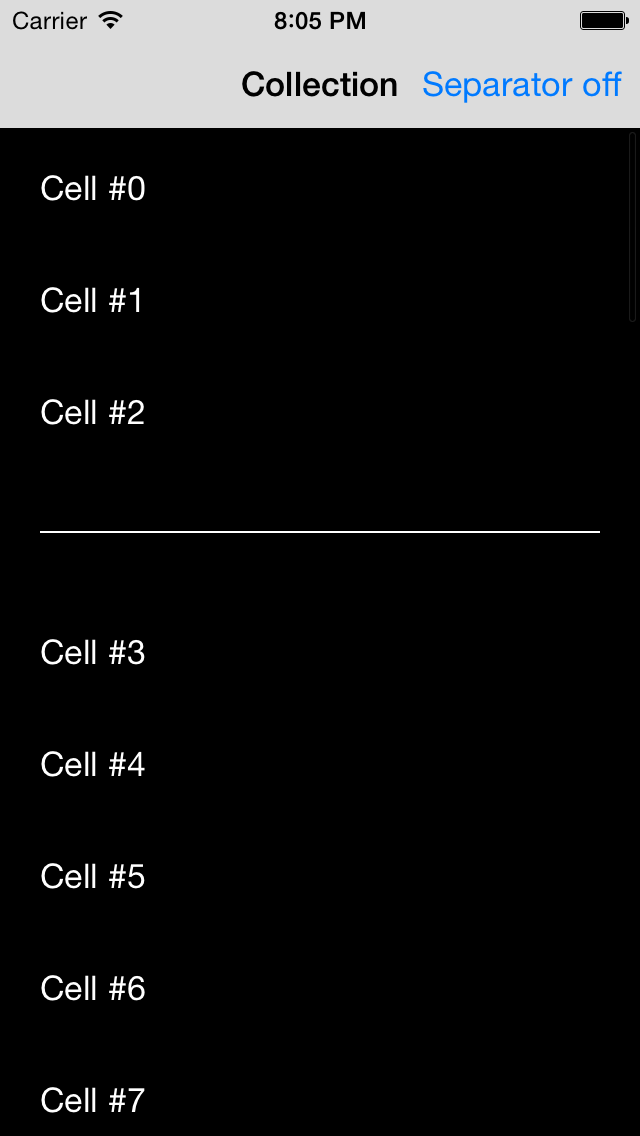
So, without further ado, here’s what it looks like. The code is on Github if you just want to grab it. I’ll discuss some implementation details below.

Limitations
This approach has a few limitations.
- Only one separator is supported at a time. It wouldn’t be hard to add multiple ones, but the math would be a bit more involved, and I don’t want to overcomplicate the example.
- Only one-column layout is supported. So in a sense, you could do the same with UITableView, except that UITableView does not have such nice concept of custom supplementary views.
- Only vertical direction is supported. It would be straightforward to make this work with horizontal scrolling as well, just switching some opeations from y/height to x/width, but it’s outside the scope of the example.
The core idea
When I was more junior and didn’t know any better, I would do horrible things when having to do something like this. Perhaps make the separator part of some cell, or, god forbid, have a custom view floating on top of the table or collection, and scroll it when the rest of content gets scrolled.
Now, though, things are different. UICollectionView and its FlowLayout do most of the heavy lifting for us, and have convenient hooks where we can customize the behavior as we want.
So, we’ll let the FlowLayout work as usual, and then, if a separator is present, just shift the items below the separator down, and draw the separator as a custom supplementary view type. FlowLayout knows only about “header” and “footer” supplementary views, but there’s no contract saying that we can’t have additional custom supplementary views in addition to these, so we do exactly that.
So let’s get started and implement this.
Register the custom supplementary view.
We don’t need a subclass or anything (although we could), we just register the ReusableView class, and handle its layout inline in the controller.
- (void)viewDidLoad
{
    [super viewDidLoad];
    // Do any additional setup after loading the view.

	// Register the separator class.
	[self.collectionView registerClass:[UICollectionReusableView class]
			forSupplementaryViewOfKind:SeparatorViewKind
				   withReuseIdentifier:@"Separator"];
}
Drawing the custom separator
After everything has been created correctly, the controller eventually gets a call to draw and configure the separator.
- (UICollectionReusableView *)collectionView:(UICollectionView *)collectionView viewForSupplementaryElementOfKind:(NSString *)kind atIndexPath:(NSIndexPath *)indexPath
{
	UICollectionReusableView *separator = [collectionView dequeueReusableSupplementaryViewOfKind:kind withReuseIdentifier:separatorReuseIdentifier forIndexPath:indexPath];

	if ([kind isEqualToString:SeparatorViewKind]) {
		separator.backgroundColor = [UIColor clearColor];

		if (!separator.subviews.count) {

      // … create the subview to represent the line, and set it up
      // if subviews were present, it means this work has already been done

		}
	}

	return separator;
}
The layout object
We’ll need a subclass of FlowLayout that also has some custom delegate methods, since it needs to know about where to draw the separator.
@protocol JKSeparatorLayoutDelegate <NSObject>

/// Index path above which the separator should be shown, or nil if no separator is present.
- (NSIndexPath *)indexPathForSeparator;

/// Check for index path validity, since layout math doesn’t know about the model.
- (BOOL)isValidIndexPathForItem:(NSIndexPath *)indexPath;

@end


@interface JKSeparatorLayout : UICollectionViewFlowLayout

@property (nonatomic, weak) IBOutlet id<JKSeparatorLayoutDelegate> separatorLayoutDelegate;

@end
Content size
We need to return the correct content size. If we don’t do this, everything else will work correctly, but some items will be out of the view and you can’t scroll to them, you just see them when rubberbanding at the end.
- (CGSize)collectionViewContentSize
{
	// Increase the content size by separator height, if one is present
	CGSize s = [super collectionViewContentSize];
	if ([self.separatorLayoutDelegate indexPathForSeparator]) {
		s.height += separatorHeight;
	}
	return s;
}
The element shifting
The real work of the layout happens in the method - (NSArray *)layoutAttributesForElementsInRect:(CGRect)rect. We get a call to it with the rect that is going to screen. We can just shift the elements below the separator down here, and also add layout attributes for the separator itself.
- (NSArray *)layoutAttributesForElementsInRect:(CGRect)rect
{
	// Grab computed attributes from parent
	NSMutableArray *attributes = [NSMutableArray arrayWithArray:[super layoutAttributesForElementsInRect:rect]];

	// Possible attributes for separator
	UICollectionViewLayoutAttributes *separatorAttributes = nil;

	for (UICollectionViewLayoutAttributes *attr in attributes) {

		// If there should be a separator above this item, then create its layout attributes
		if ([attr.indexPath compare:[self.separatorLayoutDelegate indexPathForSeparator]] == NSOrderedSame) {
			separatorAttributes = [self layoutAttributesForSupplementaryViewOfKind:SeparatorViewKind atIndexPath:attr.indexPath];

            CGRect separatorFrame = attr.frame;
            separatorFrame.size.height = separatorHeight;
            separatorAttributes.frame = separatorFrame;

		}

		attr.frame = [self adjustedFrameForAttributes:attr];

	}

	if (separatorAttributes) {
		[attributes addObject:separatorAttributes];
	}

	return attributes;
}

- (CGRect)adjustedFrameForAttributes:(UICollectionViewLayoutAttributes *)attributes
{
	CGRect f = attributes.frame;
	NSIndexPath *separatorIndexPath = [self.separatorLayoutDelegate indexPathForSeparator];

	// If there is a separator, and this item is below the separator, shift the item down
	if (separatorIndexPath) {
		if ([separatorIndexPath compare:attributes.indexPath] != NSOrderedDescending) {
			f.origin.y += separatorHeight;
		}
	}

	return f;
}
The element shifting, revisited
If you implement the above, and run it, you’ll find that it mostly works, but sometimes there is a gap in the cells.

Uh oh. What gives?
Let’s think about how layoutAttributesForElementsInRect works. It asks for layout attributes of one screenful at a time. (Actually it seems to be two screenfuls on initial run, and one screenful after that, but let’s just think about one screen.) So at first pass, the parent FlowLayout object might give us attributes for items 1-8, next 9-16, then 17-24, and so on.
But: suppose our separator is above item 4 on first screen. So the first screen contains layout for objects 1-3, separator, 4-8. And then, 8 is out of the rect so its attributes are simply discarded. They do not “carry over” to the next screen. Then, at next run, for the next screen, the parent returns attributes for 9-16, but in our case, we might want 8-15. Since 8 is not included, we’ll see a gap in its place.
To compensate for that, there’s some extra math that I’m not pasting here but that you can see in the Github project, that figures out which extra cells to add to the rect, in addition to the ones returned by parent FlowLayout.
Conclusion
UICollectionView is a fairly involved class, but has a lot of flexibility. We can let the parent classes do most of the work, and slightly customize the results from them, instead of having to do a lot of work ourselves. You’ll see that my example project implementing the above solution doesn’t actually have all that much code.